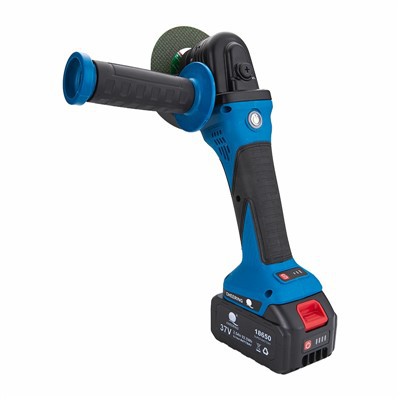
Hey there, folks! As a supplier of Handheld Angle Grinders, I've seen all sorts of questions about these handy tools. One of the most common queries I get is how to adjust the angle of the disc on a handheld angle grinder. Well, you're in luck because I'm gonna break it down for you in this blog post.


First things first, why would you even want to adjust the angle of the disc? There are actually quite a few reasons. Maybe you're working on a project that requires a specific angle for cutting or grinding. Or perhaps you're trying to reach a tricky spot that's hard to access with the disc at its default angle. Whatever the reason, being able to adjust the angle gives you more flexibility and precision in your work.
Now, let's get into the nitty - gritty of how to do it. The process can vary a bit depending on the model of your angle grinder, but I'll cover the general steps.
Step 1: Safety First
Before you even think about adjusting the disc angle, make sure you're taking all the necessary safety precautions. Wear safety goggles to protect your eyes from flying debris. Gloves are also a must to protect your hands. And don't forget to unplug the grinder if it's electric or turn off the fuel supply if it's a gas - powered one. You don't want any accidental starts while you're working on it.
Step 2: Locate the Adjustment Mechanism
Most handheld angle grinders have a specific mechanism for adjusting the disc angle. It could be a locking lever, a set of screws, or a quick - release button. On some of our 115mm Angle Grinder Variable Speed models, there's a convenient locking lever that you can easily operate. Just look around the area where the disc guard is attached to the grinder body. You'll usually find a label or a clear indication of what the adjustment mechanism is.
Step 3: Unlock the Mechanism
Once you've located the adjustment mechanism, you need to unlock it. If it's a locking lever, simply pull it or move it to the unlocked position. For screws, you'll need a screwdriver to loosen them. Make sure you don't lose any small parts during this process. It's a good idea to keep them in a small container or a magnetic tray.
Step 4: Adjust the Angle
Now comes the fun part. You can start adjusting the angle of the disc. Hold the grinder firmly and slowly rotate the disc guard and the disc assembly to the desired angle. You can use a protractor to measure the angle accurately if you need a very specific one. For example, if you're working on a project that requires a 45 - degree cut, use the protractor to make sure the disc is at exactly that angle.
Step 5: Lock the Mechanism
After you've set the angle, it's crucial to lock the adjustment mechanism back in place. If it's a locking lever, move it to the locked position. For screws, tighten them securely. You want to make sure the disc is held firmly at the adjusted angle. A loose disc can be extremely dangerous and can cause uneven cuts or even damage to the grinder.
Step 6: Test the Grinder
Once you've locked the disc at the new angle, give the grinder a quick test. Plug it in (or turn on the fuel supply) and let it run for a few seconds. Listen for any unusual noises or vibrations. If everything seems okay, you're good to go. But if you notice anything strange, turn off the grinder immediately and double - check the adjustment.
Tips and Tricks
- Practice on Scrap Material: If you're new to adjusting the disc angle, it's a good idea to practice on some scrap material first. This way, you can get a feel for how the grinder behaves at different angles without ruining your actual project.
- Keep the Grinder Clean: Dirt and debris can sometimes interfere with the adjustment mechanism. Regularly clean your grinder, especially around the area where the adjustment is made.
- Refer to the Manual: Every grinder is different, so it's always a good idea to refer to the user manual that came with your 115 Degree Angle Grinder. It will have specific instructions and safety information for your model.
In conclusion, adjusting the angle of the disc on a handheld angle grinder isn't that complicated once you know the steps. It gives you more control over your work and allows you to tackle a wider range of projects. Whether you're a professional contractor or a DIY enthusiast, being able to adjust the disc angle is a valuable skill.
If you're in the market for a new handheld angle grinder or have any questions about our products, don't hesitate to reach out. We're here to help you find the perfect tool for your needs and ensure you get the most out of it. Let's start a conversation about your procurement requirements, and we can work together to get you the right equipment at the best price.
References
- Manufacturer's user manuals for handheld angle grinders
- Industry - standard safety guidelines for power tool operation